Plone Cheat Sheet
Additional Help
Log In
- In your web browser's address bar, enter:
https://www.cabq.gov/login - Log in with your website username and password.

The web browser's address bar.
Create a New Page
- From the left-side editing menu, click "Add new..." and select Page.
- Assign your new page a Title. This title appears as the headline at the top of the page. It should be no more than six words and describe the page. If you use the word "and" in the title, replace it with an ampersand (&).
- Add a Summary to describe the page. Keep the summary to one sentence in length. Make it unique and descriptive.
- Add text, images, and links in the Text field. This is the main section of the page.
- When finished editing, click the Save button at the bottom of your screen.
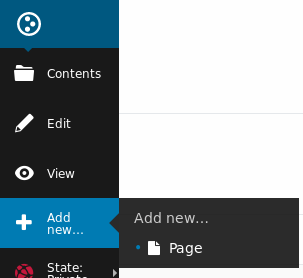
From the left-side editing menu, click "Add new..." and select Page.
Edit an Existing Page
- From the left-side editing menu, click Edit.
- Edit content click inside the page's Text field.
- When you have finished editing, click the Save button at the bottom of your screen.
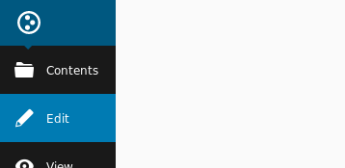
From the left-side editing menu, select Edit.
Upload an Image
- In the browser address bar, navigate to the folder's "images" subdirectory (e.g. https://www.cabq.gov/your-folder/images)
The /your-folder/ part of the address is the section of the website that you are editing.https://www.cabq.gov/your-folder/images - From the left-side editing menu, click "Add new..." and select Image.
- In the "Title" field, type a unique title for the image that will help you find it when you search for it.
- In the "Description" field, type a description of the image.
- Click the Choose File button and select your image.
- Choose Open and then Save the image.
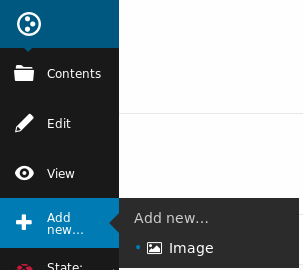
From the left-side editing menu, click "Add new..." and select Image.
Insert an Image
- Place your cursor on the page where you want the image.
- From the editing interface, click the Insert/edit Image icon:
- Place your cursor in the search box. Enter the title of your image in the search box. Browse through the results and choose your image.
- Choose the size that you would like your image to appear in pixels from the Size dropdown. Choose Inline, Right, or Left alignment from the Align dropdown.
- In the "Alternative Text" field, describe the image in five to 15 words.
- Click Insert.
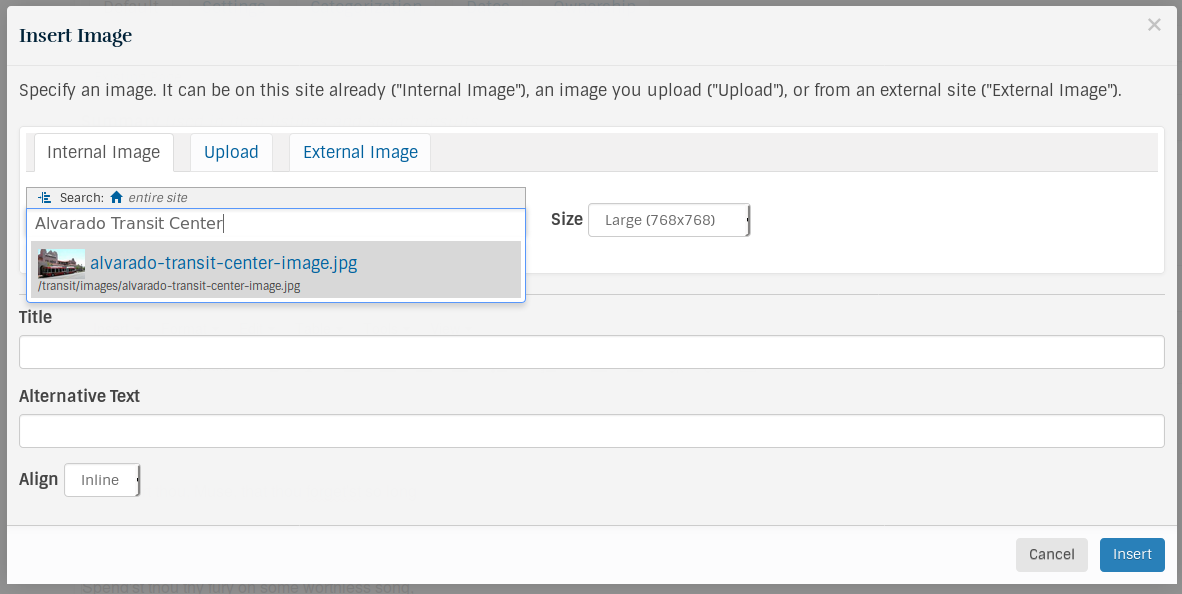
Search for your image by its name.
Upload a Document
- In the browser address bar, navigate to the folder's "documents" subdirectory (e.g. https://www.cabq.gov/your-folder/documents)
The /your-folder/ part of the address is the section of the website that you are editing.https://www.cabq.gov/your-folder/documents - From the left-side editing menu, click "Add new..." and select File.
- In the "Title" field, type a unique title for the document that will help you find it when you search for it.
- In the "Description" field, type a description of the document.
- Click the Choose File button and select your document.
- Choose Open and then Save the document.
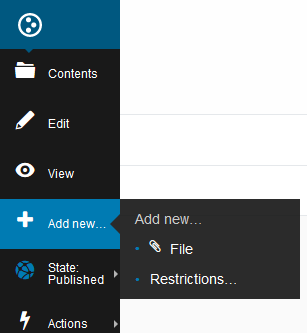
From the left-side editing menu, click "Add new..." and select File.
Insert an Internal Link or File
To link to a page or file within the City of Albuquerque's website:
- Highlight the text you want to turn into a link.
- Click the Insert/Edit Link icon:

- Chose "Internal" from the horizontal menu.
- Place your cursor in the search box and type the unique Title of the destination page or file.
- From the search results, select the destination page or file.
- Click Insert.
Insert an External Link
To link to a page outside the City of Albuquerque's website:
- Highlight the text you want to turn into a link.
- Click the Insert/Edit Link icon:

- Choose "External" from the horizontal menu.
- In the External URL field, type the destination website address.
- Click Insert.
Insert an Email Link
- Type the email address into your text, like this:
[email protected] - Highlight the email address.
- Click the Insert/Edit Link icon:

- Select Email from the horizontal menu.
- In the Email Address field, type the entire e-mail address.
- (Optional) In the Email Subject field, type a subject for the email.
- Click Insert.
Create a New News Item
- In the browser address bar, navigate to the folder's "news" subdirectory
https://www.cabq.gov/your-folder/news - From the left-side editing menu, click "Add new..." and select News Item.
- Add the headline to the Title. This title appears as the headline at the top of the page.
- Add the sub headline to the Summary. Keep the sub headline to one sentence in length.
- Select the date (Mo. Day, Year) of release.
- If the release is not located in Albuquerque, add the Dateline.
- Add text, images, and links in the Text field. This is the main section of the page.
- Add the expiration date for when this information is no longer relevant by clicking the Dates tab at the top of the page.
- Add an image to Lead Image by selecting “Browse…” and uploading an image.
- If no image is available, add a department logo to Lead Image by selecting “Browse…” and uploading a logo.
- When finished editing, click the Save button at the bottom of your screen.
- From the left-side editing menu, click "State: Private" and select Publish.
Note: Be sure to use News Items and Event Items exclusively.
Create a New Event Item
- In the browser address bar, navigate to the folder's "events" subdirectory
https://www.cabq.gov/your-folder/events - From the left-side editing menu, click "Add new..." and select Event.
- Add the event name to the Title.
- Add a one sentence summary to the Summary.
- Choose the type of meeting from the drop-down menu (on-site, virtual, or hybrid).
- Add the appropriate required information of Virtual Meeting Link, Where, Address, City, State, Zip, Start date and time, End date and time, Price, Contact Name, Email, and Phone. Note: Reoccurring events do not format properly and must be approved by the web team. The web team can provide alternative solutions to using the Recurrence tool.
- If the meeting is virtual or hybrid you must add a url to the Virtual Meeting Link field.
- If the meeting is on-site or hybrid you must fill in the Where, Address, City, State, Zip fields.
- Add text and links in the Text field. This is the main section of the page.
- Add an image to Lead Image by selecting “Browse…” and uploading an image.
- If no image is available, add a department logo to Lead Image by selecting “Browse…” and uploading a logo.
- Add an alternative text description for the image in the Image Caption field.
- When finished editing, click the Save button at the bottom of your screen.
- From the left-side editing menu, click "State: Private" and select Publish.
Note: Be sure to use Event Items and News Items exclusively.
Send Back an Expired Item
To un-publish an outdated or inaccurate Page, Event Item, News Item, uploaded Image, or uploaded Document:
- From the left-side editing menu, click "State: Published "
- Select Send Back.
Note: The unpublished item is still visible/accessible to those with access who are logged in. Any links to an un-published item are broken.